Auto Focus; 5MP/8.3MP/12MP; PC/ HDMI Mode Operation; TF Card Saving
Tags: Microscope CamerasHDMI CamerasUSB CamerasCMOS CamerasC-mount Cameras
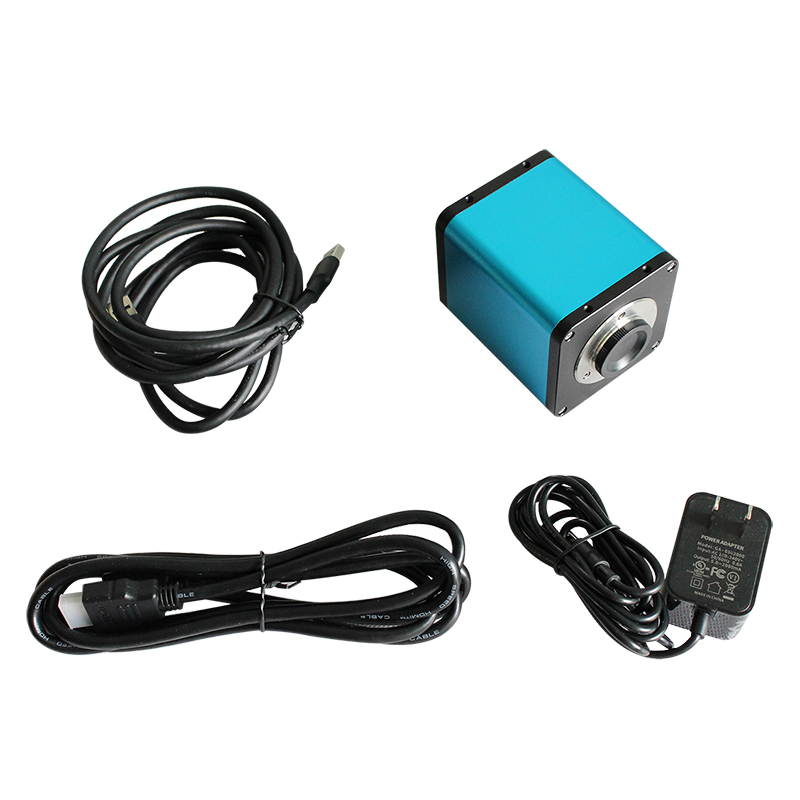
AFCUH Serie is a 4K Ultra High-resolution Microscope Camera, high-speed and stable USB & HDMI multiple outputs image transmission, can carry out different operations at the same time, which could improve work efficiency.
Using a new observation mode based on Real-time Automatic Focus function, the observation position is always in real-time focus state, without manual focus. With the HD sensor and high-speed processor built in the camera, the frame rate and focus speed are improved while providing 1080P HD images. When moving to the target observation position, the focus information is automatically recognized, and a clear image can be obtained instantly.
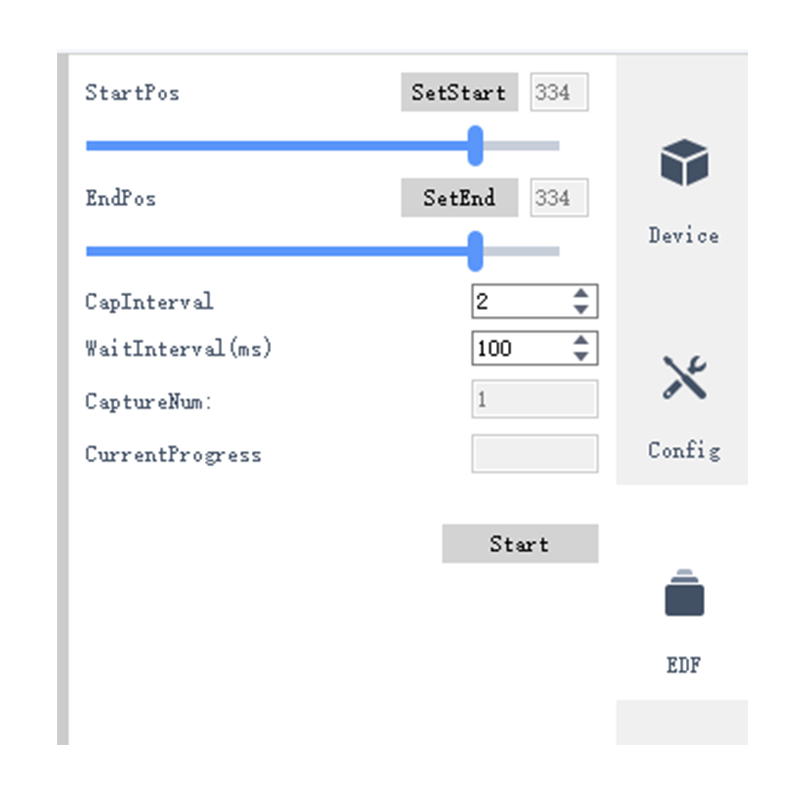
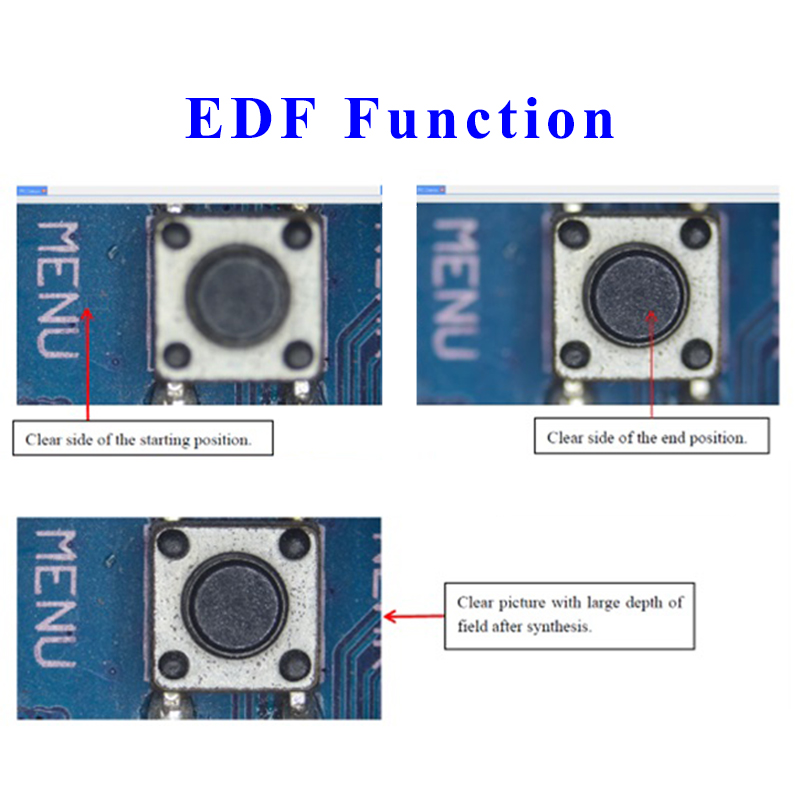
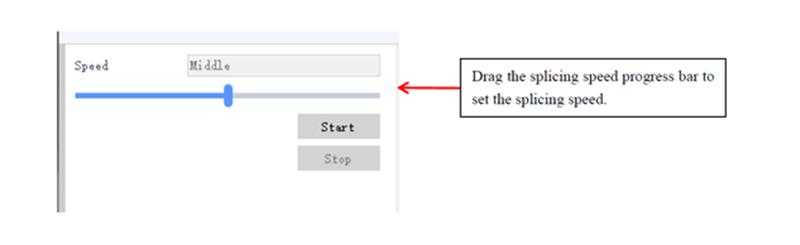
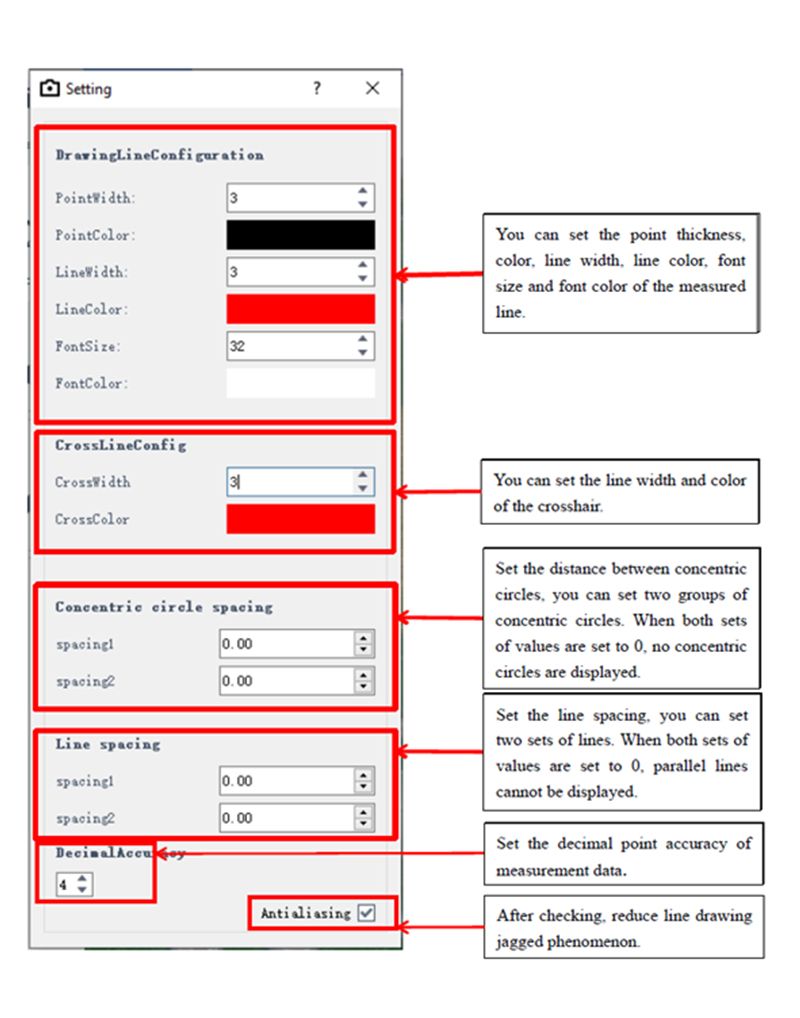
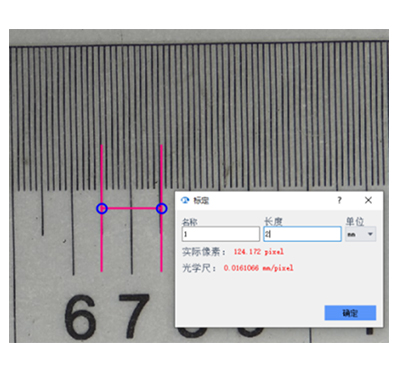
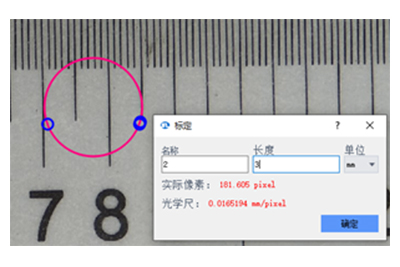
Various functions from the Image Processing Software, such as the depth of field synthesis, split, measurement etc. The sensor in the camera moves up and down for 16mm.
Available connected to a variety of image processing software, provide rich SDK development kit. It is mainly used in biomedical industry, industrial detection, monitoring system and astronomical observation.
PC Mode Matching Device
1.Front end matching:
C-mount microscope or C-mount lens.
2.Supported system platforms:
Microsoft Windows 32-bit Win7, Win8, Win10; 64-bit Win7, Win8, Win10.
3.Computer configuration requirements:
Processor: Intel(R) Core(TM) i5-6500 CPU @3.20GHz 3.19GHz, and above.
Installed memory (RAM): 4.00GB and above.
HDMI Mode Matching Device
1.Front end matching: C-mount microscope or C-mount lens.
2.Back-end matching: With HDMI, it can support 1080P@50Hz or 1080P@60Hz displays.
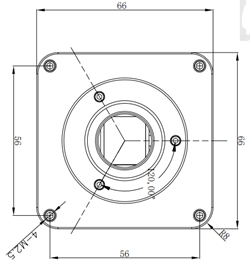
The Front View of AFCUH Camera
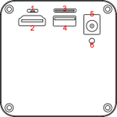
The Back View of AFCUH Camera
Structure of AFCUH Auto Focus Microscope Camera
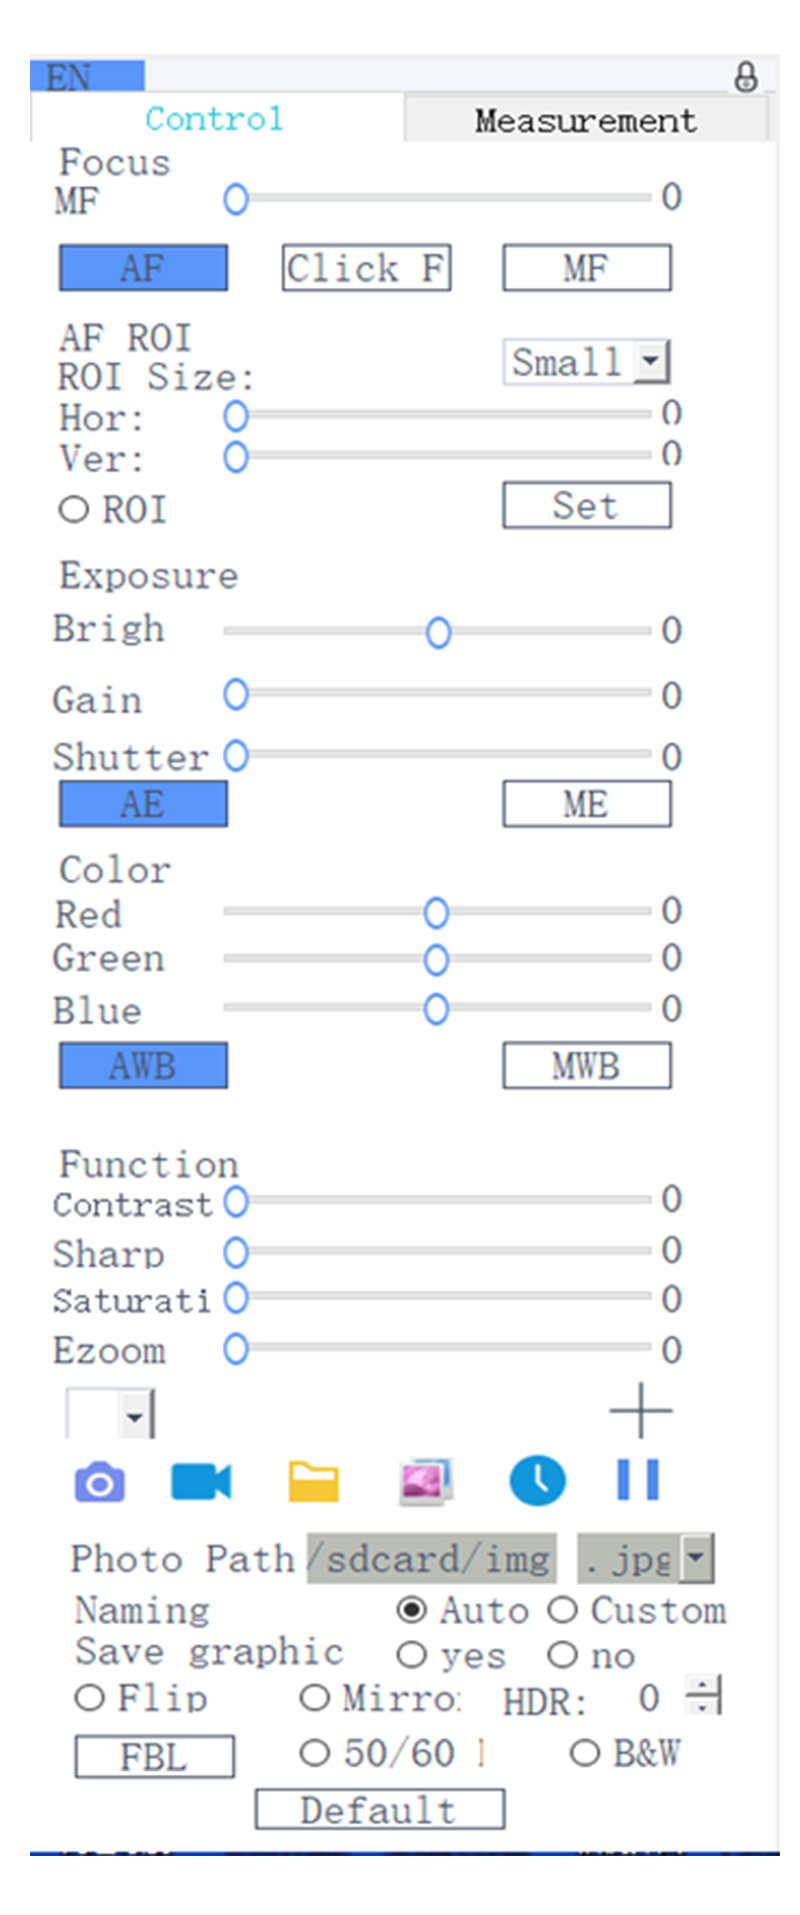
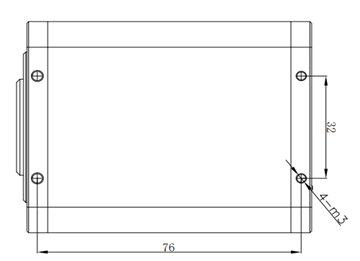
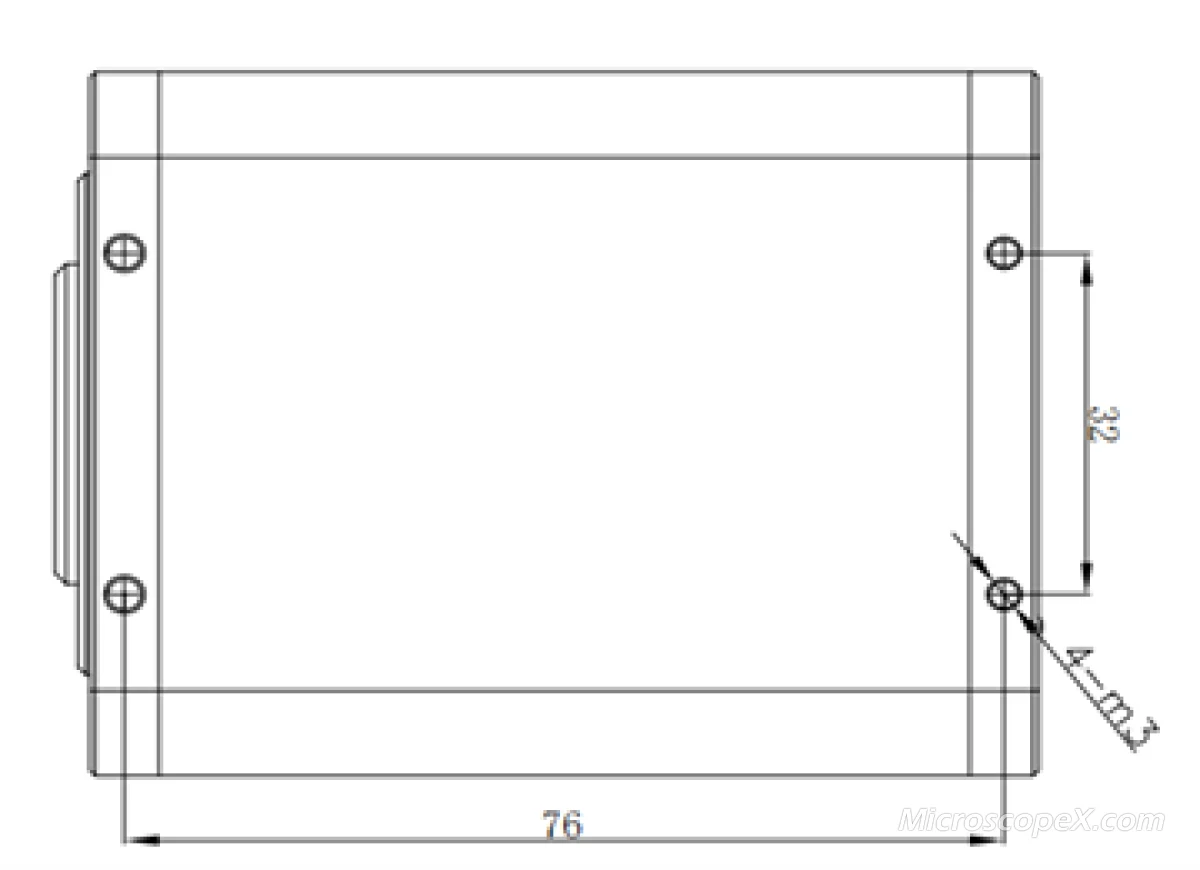
Dimension of the AFCUH Camera
Packing List for AFCUH Auto Focus Microscope Camera
Standard Packing List for AFCUH Camera | ||
---|---|---|
NO. | Item | Qty |
1 | Microscope Camera Body | 1 |
2 | HDMI Cable | 1 |
3 | USB Cable | 1 |
4 | Power Adapter | 1 |
EDF Function
This function can replace the clear part of the image with different focal planes for the unclear part, thereby obtaining a clear picture with a large depth of field. During image fusion, the direction of the object to be measured cannot be moved to avoid misalignment after image synthesis.
1. Click the "EDF" tool, click on different focal planes in the image display area to set the start position and end position respectively;
2. Set the capture interval, the larger the capture interval value, the less the number of snapshots;
3. Set the grab waiting interval, the unit is ms;
4. Click Start, and when the current progress value is consistent with the number of snapshots, the interface will display a picture. There is a hint when the synthesis is completed, and the depth of field synthesis is completed.
5. Save the synthesized picture: The synthesized picture is displayed on the screen, and then click the "Save" icon in the menu, specify the path and name, and click OK.
6. When operating the depth of field synthesis function, the focus mode will automatically switch to manual mode. The image display area shows the currently synthesized image.
Split Function
1.First set the white balance and exposure to manual exposure mode. Then adjust the brightness of the light source to adjust the exposure to an appropriate value to avoid overexposure during the splicing process.
2.Select stitching and adjust stitching speed. There are "fast, middle, slow" options for speed. Click ‘start’ to stitch the images, and the moving speed should be kept at a constant speed, not too fast, otherwise the composite image will be blurred. The direction of the image should basically keep moving in both horizontal and vertical directions, otherwise the effect will not be good. Finally click ‘stop’ to complete the image stitching.
Measuring Function
Click the measurement settings icon to set measurement-related options:
Calibration Function
1. Click the yellow triangle in the lower right corner of the calibration tool and select straight line calibration or circle calibration.
2. Activate the calibration tool in the toolbar, drag the marking line to align with the marking line of the calibration ruler.
3. Enter the lens magnification value, the actual length between the engraved lines, and then select the unit to complete the calibration.
The Microscope Experts
We are here to help you find the best microscope for your needs at the lowest possible price.
Our customers: AMScope.com, Microscope.com, Omano...